Showing posts with label Giant. Show all posts

Sunday, August 4, 2013

Nifty Shades of Grey


Ever wonder what a yellow-grey cyclops would look like?...  Me neither. Regardless, I have completed Heresy's cyclops in that very color.
 
 
This is my first Heresy mini; a great sculpt with multiple head options (assembly details here). Apart from its reduced size, which I prefer, the sculpt hits all the appropriate Harryhausen notes: goat-legs, hooves, horn, three-fingered hands.


The yellow-grey part of the equation was inspired by James Wappel's Blog and some recent experience gained with the color yellow in its non-desaturated form. 

The mini was basecoated Army Painter Ash Grey mixed with a small amount of P3 Sulfuric Yellow. Highlights were added by progressively adding more Sulfuric Yellow to the mix followed by Reaper Linen White. Shading utilized Army Painter Uniform Grey mixed with decreasing amounts of Sulfuric Yellow and ultimately a little GW Naggaroth Night.

  
Some WIP pictures:


I intended the club to be simply bone colored and painted it accordingly. Adequate but somewhat bland I felt.  In the end, I livened things up with some blood splatter. (In this case some should be read as considerable.)


A side-by-side with Otherworld's medusa and some more pictures of the finished product:


Monday, May 27, 2013

Crunch Time


I have pledged on the Otherworld Miniatures forums to paint at least one OW miniature per month throughout 2013. I haven't missed a month yet but my on-time performance has been nothing to write home about.

Punctuality is not one of my virtues it seems (at least within the realm of miniature painting).

Pictured above are some minis intended for May & June (hoping to get a jump on next month). From left to right they are: a cleric/monk from Gamezone, a gnome from Center Stage, A medusa from OW, a demon from OW, and a cyclops from Heresy. The cleric/monk & demon will be paired up for May while the medusa and cyclops are meant for June. 

The gnome is the odd-man-out. (or is that odd-gnome-out?)


A great little Patrick Keith sculpt from the recently concluded Torn World Kickstarter. I removed his integral base and sculpted a replacement. A lot of detail in a confined space on this one. Should be fun.

Center Stage's current Tome of Horrors Complete campaign is picking up steam as it nears its end. The work of sculptor Drew Williams has been especially impressive. Check out these WIPs.


Nice. They may call them tsathars but they look like bullywugs to me. Hopefully CSM gives Mr Williams as much work as he can handle.

Saturday, April 20, 2013

British Invasion


I need more minis like I need another hole in the head. This undeniable truth didn't prevent me from taking advantage of sales recently run by British manufactures Otherworld and Heresy. I picked up some cool stuff at a good price.

And so the lead pile grows.

One mini, however, has earned the rare distinction of going straight from the package to my workbench; Heresy's cyclops. He has been paired with Otherworld's meazels for this month's painting challenge on the OW forums.


The cyclops comes standard with three different heads. I chose the one I liked best, pinned it in place (after some re-shaping of the neck for a better fit), and applied green-stuff.


The arms were attached followed by more green-stuff. After this cured, I addressed a rough spot in my work with some Tamiya white putty diluted with lacquer thinner followed by a light sanding.


The meazels are one piece castings and therefore much easier to deal with. At least that was the theory.

Upon close examination one of the minis turned out to be miscast. A rope garrote was largely missing. This lead to a crash course in making rope from copper wire. Fiddly work to be sure; not least of all because it was necessary first to remove what remained of the original garrote.


My boiler-plate basing procedure, arrived at through trial and error, was used here. Speaking in general terms, the drill goes something like this:
  • Minis are shimmed with plastic card so they wind up slightly elevated from their bases. This allows for the thickness of the PVA glue used to secure the basing grit and results in a mini that appears to be standing on the ground as opposed to partially buried in it.
  • The tops of any mounting tabs are filed down so that they remain flush with the tops of their bases.
  • I collect the grit myself. I find commercially available products to be both too coarse and too uniform.
  • Once the grit is applied and the PVA dry, a coat of matte varnish is applied to hold everything in place.
  •  Minis are thoroughly washed prior to basing and receive a light rinse before being primed. The second wash is mostly to remove any residual grit that has found its way onto the mini itself. The varnish coat helps to keep everything in place during this step. That said, I still avoid scrubbing the base with my ever-present toothbrush at this point and quickly blot off any residual water with a paper towel. 


So much for generalities. Returning to specifics, I now have four minis awaiting primer and paint:

Saturday, February 23, 2013

Giant Kegger


I have finally finished my Reaper hill giantess conversion. Originally conceived as a suitable accompaniment for Otherworld's hill giant, she suffered through an extended stay on the back burner. Well, it's Friday night and she appears eager to make up for lost time. She's liquored up, she's got her red dress on and she's ready to go clubbing.

The conversion was an exercise in addition through subtraction. The more bits and pieces I hacked off, the better it looked. I removed the staff, cleaver, mammoth tusks, pigtail, sickle, a chunk of her skirt, a small frog, and a host of piercings.


The staff was re-purposed as a club and a mammoth tusk as a drinking horn. I cut away the base except for a section under the right foot which would serve as the starting point for a slab of rock. The thumb on the right hand was removed and the fingers pried open to accommodate the drinking horn. Some bending (made easier because this casting was part of Reaper's discontinued P-65 line) and putty-work followed and she was ready for paint.


The Otherworld giant is basically stock except for the base. OW supplies the mini with a metal base which I sanded down and mated to a standard base. A lot of filing, filling, and sanding was required to make this work. I also gouged out the area under his left foot and built up the area under his right so he would stand more vertically.


The beer kegs (looted from their original Dwarven owners) are resin oil drums dressed up with GW bits and some treasure from Reaper. The tarp is facial tissue coated with thinned PVA glue. Solder was used to represent the hose coming off the tap.


The flesh tones on both minis were achieved with Reaper's olive skin triad and Vallejo washes. I took some baby steps into the realm of tattoo painting with the aid of this excellent tutorial.

Saturday, August 25, 2012

The Hills Have Cankles


An update on the state of project hill giant. I want to finish before September arrives (the giants, not the post). I'll keep it brief so I can return to the painting cave ASAP.

I suffered a setback as a result of my basing. Of late I've been going ever smaller with the size of basing grit in an attempt to get a better in-scale effect. I've also noticed an issue in that I unintentionally wind up removing some of the the grit during the pre-primer wash. With this in mind I washed the giants, applied the grit, and then primed (in that order).

That was a mistake.

Once primed and basecoated it became obvious that a layer of fine dust had been deposited on sections of the mini and that consequently the final product was pretty well ruined.

There seemed no easy remedy so, after much cursing and a fair amount of hesitation, I hit the offending bits with steel wool, fine sandpaper, and a motor-tool equipped with a wire brush attachment. I then gave her a good rinse and re-primed. This greatly improved the state of things but it did take some time.

To paraphrase Ricardo Montalban from The Wrath of Khan: time is a luxury I do not enjoy. The on-schedule completion of the project is in doubt.


On the positive side of the ledger, I've gotten to play around with Reaper's olive skintones that were originally meant for the OW stone giant. I'm pleased with the results thus far.

Much work remains to be done.

Don't even get me started on the current state of the Otherworld hill giant.


Sunday, July 15, 2012

How Grey Was My Stone Giant


Hooray, huzza, and all of that! Project stone giant has come to a successful conclusion. While future generations may mark this day with parades and fireworks, I thought it best to put down my champagne glass briefly and provide some details. This is as much for my own benefit as anything else. A record of how I arrived at the final product will make it easier to add new members to the tribe if circumstances allow. Memory being what it is, I don't want to be scratching my head six months or a year from now, trying to recall what paints I used. A little note-taking never hurt anyone.


My plan was to throw old-school orthodoxy to the wind and paint him with a normal skin-tone and tattoos. (That's right, tattoos.) To this end, I ordered Reaper's olive skin triad and did some research on cave paintings. I found a depiction of a wooly rhino that would look good on his back as well as info on stone age symbols in general. Ooo! The rhino tattoo would tie in nicely with an actual wooly rhino miniature, I thought. As it happens, my extensive lead pile contains just the thing: a honking-great wooly rhino by DeeZee.

So it was settled - a hunter/quarry theme. A decidedly flesh-toned, stone-age stone giant, come down from the mountains to hunt, his skin decorated with tattoos similar to cave paintings. Genius, I tells ya!

By this point you may be wondering why the pictures bear no resemblence to what I"m describing.

The best laid schemes of mice and men (and miniature painters) often go awry. On opening the blister containing the reaper paints, I discovered that it had been mispacked. Two of the colors were wrong. (I really should inspect these things when they arrive rather than waiting until I'm moments away from using them.)

At this point I could: A) Put the project aside until I had the proper paint in hand, B) Use flesh colors I already had, or C) Scrap my original plan and go in a different direction.

I had already committed myself to finishing the mini as part of  OW's painting challenge so "A" was out. "B" didn't work either. I had chosen the olive skin-tone because it borders on a stone color, isn't pink in the slightest, and is light enough to be a good background for tattoos. The paints I had or could get on short notice didn't seem to fit the bill. So "C", "gray or gray-brown" to quote Gygax, looked to be the winner.


 Gray-brown offered the opportunity for some experimentation as it turned out. Pictured above are the paints and additives used in painting the skin. Uniform grey mixed with a little chaos black was used as the base. This was given a wash of fleshtone shade mixed with black shade, then highlighted with glazes of uniform grey and ash grey. Glazes of khardic flesh were then applied overall with particular attention paid to the face, soles of the feet, palms, knees and elbows. Where I overdid the khardic flesh a bit, I went back and toned it down with more grey. The red leather was used on the lower lip.


On the subject of glazing, GW's lahmian medium may be my new best friend. When mixed with a small amount of paint it makes a great glazing medium. Some pretty subtle effects are possible with this stuff.


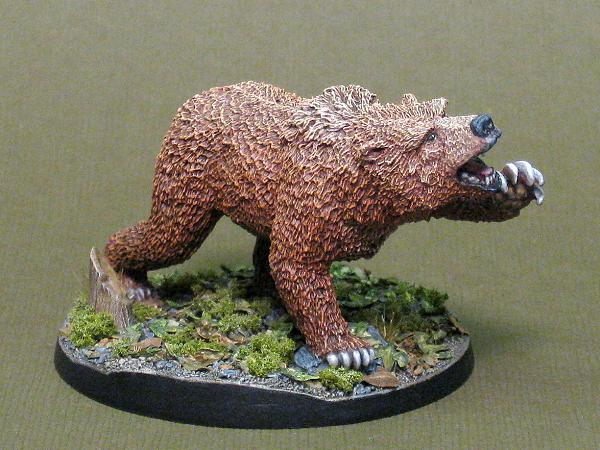
The cave bear was a more straightforward undertaking. Being mostly fur, he received the wash and drybrush treatment for the most part. In an attempt to achieve a more subtle effect, I gradually lightened the drybrushed color as I went higher on the body and did some glazing with the lightest color around his face and muzzle. The real detail painting was reserved for the mouth, eyes, and claws.


That's that. One basic, run of the mill, grey stone giant and his cookie-cutter sidekick. (Yawn.) In the end, I used some of the stone age symbols on the club and bag, and I still have the Olive skintone triad (Reaper made good on their mistake). Might work well on a hill giant I suppose.

I'll have to save my acts of apostasy against the old-school for another day it seems.

I wonder what a brick red fire giant would look like...