Showing posts with label Geoff Valley. Show all posts

Sunday, July 15, 2012

How Grey Was My Stone Giant


Hooray, huzza, and all of that! Project stone giant has come to a successful conclusion. While future generations may mark this day with parades and fireworks, I thought it best to put down my champagne glass briefly and provide some details. This is as much for my own benefit as anything else. A record of how I arrived at the final product will make it easier to add new members to the tribe if circumstances allow. Memory being what it is, I don't want to be scratching my head six months or a year from now, trying to recall what paints I used. A little note-taking never hurt anyone.


My plan was to throw old-school orthodoxy to the wind and paint him with a normal skin-tone and tattoos. (That's right, tattoos.) To this end, I ordered Reaper's olive skin triad and did some research on cave paintings. I found a depiction of a wooly rhino that would look good on his back as well as info on stone age symbols in general. Ooo! The rhino tattoo would tie in nicely with an actual wooly rhino miniature, I thought. As it happens, my extensive lead pile contains just the thing: a honking-great wooly rhino by DeeZee.

So it was settled - a hunter/quarry theme. A decidedly flesh-toned, stone-age stone giant, come down from the mountains to hunt, his skin decorated with tattoos similar to cave paintings. Genius, I tells ya!

By this point you may be wondering why the pictures bear no resemblence to what I"m describing.

The best laid schemes of mice and men (and miniature painters) often go awry. On opening the blister containing the reaper paints, I discovered that it had been mispacked. Two of the colors were wrong. (I really should inspect these things when they arrive rather than waiting until I'm moments away from using them.)

At this point I could: A) Put the project aside until I had the proper paint in hand, B) Use flesh colors I already had, or C) Scrap my original plan and go in a different direction.

I had already committed myself to finishing the mini as part of  OW's painting challenge so "A" was out. "B" didn't work either. I had chosen the olive skin-tone because it borders on a stone color, isn't pink in the slightest, and is light enough to be a good background for tattoos. The paints I had or could get on short notice didn't seem to fit the bill. So "C", "gray or gray-brown" to quote Gygax, looked to be the winner.


 Gray-brown offered the opportunity for some experimentation as it turned out. Pictured above are the paints and additives used in painting the skin. Uniform grey mixed with a little chaos black was used as the base. This was given a wash of fleshtone shade mixed with black shade, then highlighted with glazes of uniform grey and ash grey. Glazes of khardic flesh were then applied overall with particular attention paid to the face, soles of the feet, palms, knees and elbows. Where I overdid the khardic flesh a bit, I went back and toned it down with more grey. The red leather was used on the lower lip.


On the subject of glazing, GW's lahmian medium may be my new best friend. When mixed with a small amount of paint it makes a great glazing medium. Some pretty subtle effects are possible with this stuff.


The cave bear was a more straightforward undertaking. Being mostly fur, he received the wash and drybrush treatment for the most part. In an attempt to achieve a more subtle effect, I gradually lightened the drybrushed color as I went higher on the body and did some glazing with the lightest color around his face and muzzle. The real detail painting was reserved for the mouth, eyes, and claws.
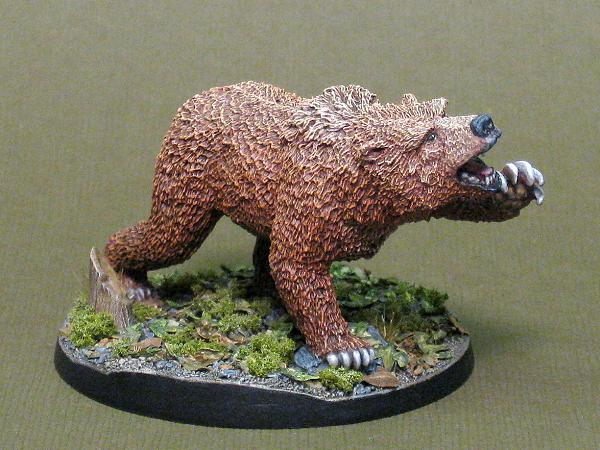


That's that. One basic, run of the mill, grey stone giant and his cookie-cutter sidekick. (Yawn.) In the end, I used some of the stone age symbols on the club and bag, and I still have the Olive skintone triad (Reaper made good on their mistake). Might work well on a hill giant I suppose.

I'll have to save my acts of apostasy against the old-school for another day it seems.

I wonder what a brick red fire giant would look like...

Friday, June 1, 2012

Giant Strides?


Work continues on the OW stone giant conversion. The sculpting is pretty much done. The base needs some additional attention and then it's on to painting. I even rustled up a cave bear sidekick (this season's must have accessory for the trendy stone giant).


One of my goals was to replace the stock club (at the top of the picture above) with something larger. The new weapon comes from Reaper's Reptus weapons set (#14449). The jawbones lashed to its business-end are a nice detail and synch up well with the animal teeth hanging from the giant's belt. The Reaper club has a lot of extraneous detail beyond the jawbones that was removed. A file was then dragged forcefully along the surface to reestablish a bark/woodgrain  effect.


 Another goal was to achieve a more relaxed pose by straightening the left arm and repositioning it closer to the body. A cut was made from the crook of the arm to the point where the elbow joint would be. It was then bent to the desired position and reenforced with metal scraps. Both arms were filed down considerably at the points where they meet the body. In this way the left arm was lowered and rolled forward while the right was rotated back nearly 90 degrees.

A lot of test fitting and pinning was done prior to final assembly. In places I reshaped the mini to allow for the new pose (the left shoulder-blade and bicep in particular).


This side-by-side of the stock and converted versions illustrate the changes. The figure on the left is painted by Alex Bews and appears in OW's gallery.


The sculpting went smoother than feared (pun intended). Armed with Privateer Press P3 putty, a newly acquired set of dental tools, and some pictures of the anatomy of the arm, I had at it. The sculpting to-do list consisted of: both shoulders, the thumb and fingertips of the right hand, the end of the club, and the open end of the bag. A useful tip gained from sculptor John Pickford over on the OW forum: use Chapstick to lubricate tools and assist in smoothing out the final product. The stuff works like a charm.

I also found this post by Patrick Keith very helpful.


To form the open end of the bag, I rolled out a thin sheet of putty, formed a small tube, and attached one end to the hand. I then inserted a closed a pair of tweezers into the other end and carefully allowed them to open, thereby expanding the tube. Once the putty was thoroughly stretched, I poked at it a bit until I was satisfied with the overall shape.

Maybe it was all the poking and stretching or perhaps the result of some Chapstick in the wrong spot, but once dry the whole assembly promptly fell off. I cleaned the mating surfaces with rubbing alcohol and superglued it back on. Have my fingers crossed that it stays put.

I also have my fingers crossed that the painting goes as well as the sculpting. To be continued.