Showing posts with label Conversion. Show all posts

Monday, June 9, 2014

Sticky Pseudo-Mummy


The Fiend Folio Project has gained another member. This time out it's an adherer... the oft disparaged sticky mummy.

Your mother was a lint roller and your father resembled Boris Karloff.

Basically this guy's gig consists of hanging out looking just like a mummy until encountered, after which it becomes evident that A) he's not a mummy, B) he's not even undead, and C) everything (and I do mean everything) sticks to him as if he were covered in super-strength flypaper. (For more on the adherer's checkered past and uncertain present, check out Bogleech* and the recent offering from Patch at The Daily Bestiary.)
 * The source of this post's title, in fact.

I've come close to doing this conversion before. What could be easier than slapping a sword onto a mummy's chest, after all. The deal-breaker was my fear that the result would look like a mummy with a sword slapped on its chest.

That changed with the recent release of FGCW16 - Undead by Fenris Games. Clearly this is a mummy of sorts, but with numerous atypical features (elongated tongue, tentacles, grotesquely enlarged left arm). Just the thing for a monster that looks like a mummy but isn't.


The actual conversion was easy enough. I filed a groove into the left shoulder, nestled a sword from my spare parts box among the various sores and writhing tendrils, and used green stuff to extend one of the wrappings over the blade. Hopefully that last part conveys the sense that the wrappings are themselves animate and actively involved in the adhesion process. If nothing else, it makes the sword look like a proper part of the mini as opposed to a clumsy "bolt-on" by yours truly.


The FF entry mentions the adherer's affinity for spiders so the base topper by Otherworld seemed fitting.

Painting followed the mode of some of my recent greyed-out undead, only this time with a green fleshtone as opposed to blue or purple. The tips of the tentacles wound up bright pink as I really wanted them to stand out. The sword is my attempt at NMM bronze following the advice found at Sprocket's Small World.

I've Googled "Adherer Miniature" to no avail so this may well be an internet first. You're welcome, internet. While I sit here feeling extremely pleased with myself, do enjoy the following:


Saturday, March 23, 2013

Shadow Demon Blues


The shadow demon is complete and The FF Project has gained another member:

(L to R) Blindheim, Shadow Demon, Forlarren
The mini allows a nice contrast between the very simple scheme on the actual demon and the abundance of color on the base. The colors used on the demon were Reaper Military Blue, P3 Frostbite, and GW Chaos Black.

The three-part WIP photo below shows the base in various stages of completion: A) black wash and grey/white drybrushing over grey primer,  B) the basic colors glazed on followed by some selectively applied washes, and C) highlights and some stronger shadows where needed.


Revisiting the construction of the base for a moment, the Reaper treasure mound was too large for the base until I reduced its size with my trusty motor tool. I had a pretty good idea of where the demon should be mounted and tried to work things out so that point wound up at the base's center. This required the removal of everything behind the chest. The resultant void was filled in with green stuff.

The coin-pile was extended to the front edge of the base with some stretched plastic sprue cut into disks and embedded in more green stuff. 


And finally a few more pics of the end result:

Friday, December 7, 2012

No Respect


In the early eighties the subject of today's post was described as a "frog-like humanoid with huge eyes that shine like searchlights". I refer not to Rodney Dangerfield following a tragic industrial accident, but rather to the blindheim; a creature found in 1981's Fiend Folio. Like the late, great, Mr. Dangerfield, the blindheim (and for that matter, the entire Fiend Folio) is notable for receiving no respect.

As evidence of the blindheim's standing, I present exhibits A and B.


Maybe I'm just dense, but I fail to see why the little yellow guy deserves such scorn. Seems like a perfectly workable concept to me. When I came across Valiant Enterprises' oni demon I saw the opportunity for a straightforward conversion project.


Right from the blister the mini has some issues: 1) static pose: It looks like he's trying to surrender. 2)eye line: Why is he staring at the ceiling? 3)ears: I kinda like these but they're anything but frog-like. 4)teeth: These are a bit slab-shaped in spots and lack definition between themselves and the gums.

Nothing too serious. The pose and eye-line were addressed through some considerable bending. The ears were removed and the teeth reshaped with files and a hobby-knife. The addition of a tongue from Otherworld's giant frogs helped to accentuate further his inner amphibian.

What I wound up with has not two eyes but four and is slightly larger than described but hits all the important notes nonetheless (frog-like, large eyes, vicious bite).


His other vital features (yellow coloration, glowing eyes) were handled with paint. The yellow was achieved with P3 sulfuric yellow and heartfire, GW dark flesh and casandora yellow shade, Vallejo umber shade, and Reaper linen white.

I went with a vivid purple tongue because purple sits opposite yellow on the old color wheel.

The eyes are my first attempt at OSL.


Saturday, August 25, 2012

The Hills Have Cankles


An update on the state of project hill giant. I want to finish before September arrives (the giants, not the post). I'll keep it brief so I can return to the painting cave ASAP.

I suffered a setback as a result of my basing. Of late I've been going ever smaller with the size of basing grit in an attempt to get a better in-scale effect. I've also noticed an issue in that I unintentionally wind up removing some of the the grit during the pre-primer wash. With this in mind I washed the giants, applied the grit, and then primed (in that order).

That was a mistake.

Once primed and basecoated it became obvious that a layer of fine dust had been deposited on sections of the mini and that consequently the final product was pretty well ruined.

There seemed no easy remedy so, after much cursing and a fair amount of hesitation, I hit the offending bits with steel wool, fine sandpaper, and a motor-tool equipped with a wire brush attachment. I then gave her a good rinse and re-primed. This greatly improved the state of things but it did take some time.

To paraphrase Ricardo Montalban from The Wrath of Khan: time is a luxury I do not enjoy. The on-schedule completion of the project is in doubt.


On the positive side of the ledger, I've gotten to play around with Reaper's olive skintones that were originally meant for the OW stone giant. I'm pleased with the results thus far.

Much work remains to be done.

Don't even get me started on the current state of the Otherworld hill giant.


Sunday, July 15, 2012

How Grey Was My Stone Giant


Hooray, huzza, and all of that! Project stone giant has come to a successful conclusion. While future generations may mark this day with parades and fireworks, I thought it best to put down my champagne glass briefly and provide some details. This is as much for my own benefit as anything else. A record of how I arrived at the final product will make it easier to add new members to the tribe if circumstances allow. Memory being what it is, I don't want to be scratching my head six months or a year from now, trying to recall what paints I used. A little note-taking never hurt anyone.


My plan was to throw old-school orthodoxy to the wind and paint him with a normal skin-tone and tattoos. (That's right, tattoos.) To this end, I ordered Reaper's olive skin triad and did some research on cave paintings. I found a depiction of a wooly rhino that would look good on his back as well as info on stone age symbols in general. Ooo! The rhino tattoo would tie in nicely with an actual wooly rhino miniature, I thought. As it happens, my extensive lead pile contains just the thing: a honking-great wooly rhino by DeeZee.

So it was settled - a hunter/quarry theme. A decidedly flesh-toned, stone-age stone giant, come down from the mountains to hunt, his skin decorated with tattoos similar to cave paintings. Genius, I tells ya!

By this point you may be wondering why the pictures bear no resemblence to what I"m describing.

The best laid schemes of mice and men (and miniature painters) often go awry. On opening the blister containing the reaper paints, I discovered that it had been mispacked. Two of the colors were wrong. (I really should inspect these things when they arrive rather than waiting until I'm moments away from using them.)

At this point I could: A) Put the project aside until I had the proper paint in hand, B) Use flesh colors I already had, or C) Scrap my original plan and go in a different direction.

I had already committed myself to finishing the mini as part of  OW's painting challenge so "A" was out. "B" didn't work either. I had chosen the olive skin-tone because it borders on a stone color, isn't pink in the slightest, and is light enough to be a good background for tattoos. The paints I had or could get on short notice didn't seem to fit the bill. So "C", "gray or gray-brown" to quote Gygax, looked to be the winner.


 Gray-brown offered the opportunity for some experimentation as it turned out. Pictured above are the paints and additives used in painting the skin. Uniform grey mixed with a little chaos black was used as the base. This was given a wash of fleshtone shade mixed with black shade, then highlighted with glazes of uniform grey and ash grey. Glazes of khardic flesh were then applied overall with particular attention paid to the face, soles of the feet, palms, knees and elbows. Where I overdid the khardic flesh a bit, I went back and toned it down with more grey. The red leather was used on the lower lip.


On the subject of glazing, GW's lahmian medium may be my new best friend. When mixed with a small amount of paint it makes a great glazing medium. Some pretty subtle effects are possible with this stuff.


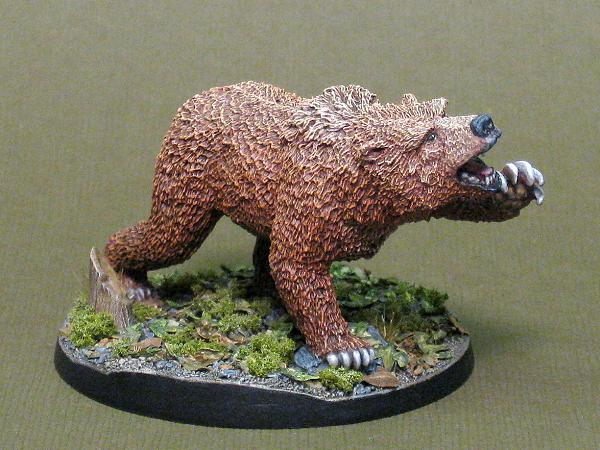
The cave bear was a more straightforward undertaking. Being mostly fur, he received the wash and drybrush treatment for the most part. In an attempt to achieve a more subtle effect, I gradually lightened the drybrushed color as I went higher on the body and did some glazing with the lightest color around his face and muzzle. The real detail painting was reserved for the mouth, eyes, and claws.


That's that. One basic, run of the mill, grey stone giant and his cookie-cutter sidekick. (Yawn.) In the end, I used some of the stone age symbols on the club and bag, and I still have the Olive skintone triad (Reaper made good on their mistake). Might work well on a hill giant I suppose.

I'll have to save my acts of apostasy against the old-school for another day it seems.

I wonder what a brick red fire giant would look like...

Friday, June 1, 2012

Giant Strides?


Work continues on the OW stone giant conversion. The sculpting is pretty much done. The base needs some additional attention and then it's on to painting. I even rustled up a cave bear sidekick (this season's must have accessory for the trendy stone giant).


One of my goals was to replace the stock club (at the top of the picture above) with something larger. The new weapon comes from Reaper's Reptus weapons set (#14449). The jawbones lashed to its business-end are a nice detail and synch up well with the animal teeth hanging from the giant's belt. The Reaper club has a lot of extraneous detail beyond the jawbones that was removed. A file was then dragged forcefully along the surface to reestablish a bark/woodgrain  effect.


 Another goal was to achieve a more relaxed pose by straightening the left arm and repositioning it closer to the body. A cut was made from the crook of the arm to the point where the elbow joint would be. It was then bent to the desired position and reenforced with metal scraps. Both arms were filed down considerably at the points where they meet the body. In this way the left arm was lowered and rolled forward while the right was rotated back nearly 90 degrees.

A lot of test fitting and pinning was done prior to final assembly. In places I reshaped the mini to allow for the new pose (the left shoulder-blade and bicep in particular).


This side-by-side of the stock and converted versions illustrate the changes. The figure on the left is painted by Alex Bews and appears in OW's gallery.


The sculpting went smoother than feared (pun intended). Armed with Privateer Press P3 putty, a newly acquired set of dental tools, and some pictures of the anatomy of the arm, I had at it. The sculpting to-do list consisted of: both shoulders, the thumb and fingertips of the right hand, the end of the club, and the open end of the bag. A useful tip gained from sculptor John Pickford over on the OW forum: use Chapstick to lubricate tools and assist in smoothing out the final product. The stuff works like a charm.

I also found this post by Patrick Keith very helpful.


To form the open end of the bag, I rolled out a thin sheet of putty, formed a small tube, and attached one end to the hand. I then inserted a closed a pair of tweezers into the other end and carefully allowed them to open, thereby expanding the tube. Once the putty was thoroughly stretched, I poked at it a bit until I was satisfied with the overall shape.

Maybe it was all the poking and stretching or perhaps the result of some Chapstick in the wrong spot, but once dry the whole assembly promptly fell off. I cleaned the mating surfaces with rubbing alcohol and superglued it back on. Have my fingers crossed that it stays put.

I also have my fingers crossed that the painting goes as well as the sculpting. To be continued.

Monday, May 7, 2012

Proof of Concept

The Otherworld stone giant has at last felt the wrath of my razor-saw and bastard-file. It's a conversion project that's been lurking inside my head for quite some time. The fact that I elected to include this mini in my 2012 OW painting pledge forced the issue.

I love the sculpt (it was one of the first OW miniatures I ever bought) but always felt that the club, while true to the MM illustration, was undersized. I have therefore substituted a proper giant sized club from Reaper. This required a whole lot of filing to reposition the right arm as well as the removal of the thumb and fingertips. Obviously there's some sculpting in my future.

Equally obvious, given the pace at which I work, this may take a while to complete.
   

Saturday, February 25, 2012

Von Pickford Lives...


And so do I.

This is where I might offer a half-arsed explanation as to why I haven't posted in nearly a year. It's a long story. In the interest of brevity, and to preserve my positive state of mind, I'll forgo my tale of woe and just move on to new business.

The titular Von Pickford is none other than the evil wizard Johann Von Pickford from last year's Otherworld Miniatures' painting challenges; specifically, the December 11/January 12 installment. Chris (AKA DukeoftheBloodKeep) has done a great job of keeping the Members on the OW Forums engaged and producing painted minis from month to month. I must confess to being proud of my own small contribution to this continuing undertaking.


Ironically, the mini is produced by Reaper, not OW. The rules are pretty forgiving and require only a 50/50 mix of OW to non-OW products. I'm especially pleased with how the back of the cloak and my first halting attempts at freehand painting turned out. The skin-tone is a happy accident. I was aiming for a sickly, undead look by combining Vallejo Red Leather and Bronze Green with GW Rotting Flesh. Guess the tales of how the old masters would add green to their flesh tones are true after all. Despite my best efforts, old Johann wound up the very picture of health. Given the direction my experiment was heading, the undead angle was shelved, and I opted for ivory-colored robes as a contrast to my subjects dark complexion.


More suitably undead results were obtained on these ghouls (the OW component of my entry) by using a paint recipe similar to my previously completed wight. They're mounted on resin bases from Forgecraft. Nice bases. The garish paintjobs on the site do them a disservice.


I'm a sucker for converting figures as well as obscure/unloved D&D critters. The forlarren (also part of my OW entry) fits the bill on both counts. Sandwiched in The Fiend Folio between the flumph (undisputed king of all crappy monsters) and frost man (so forgettable that in the time it has taken to type this, I've actually forgotten him) the forlarren gets no respect. If there is, or ever was, a miniature of this guy, I'm unaware of it. I once suggested on the OW forums that Richard consider producing a forlarren. I was asked to go away and not return until I had something sensible to say ;-)


It seemed that if I wanted a forlarren, I"d have to build one myself. Or, being the lazy sort that I am, find an extant miniature that met my needs. Satyrs and demons offered the best hope and, in the end, an old Grenadier mini (M-20, Kadastraal Spreader of Plagues) came very close. Ultimately, I decided that his lack of hooves wasn't a deal breaker and went with him 'as is'.

The 'conversion' part of the project was limited to basing and painting. Placed in a woodland setting and painted in earth tones he really looks the part. A miniature's base is a chance to provide context. The same figure, if placed on a lava-themed or flagstone base, would not have conveyed the needed information.

It occurs to me too that Kadastraal was part of a box-set and some of his demonic brethren present similar opportunities for unmodified conversions. I'll have to put that on my to-do list. As things stand, I've committed myself to painting something by OW every month. There's no rest for the weary.

Tuesday, November 9, 2010

A Snail's Pace

Damn, I'm slow. This WIP picture is proof that progress has been made on the troll. Unfortunately, spare time to work on him has been in short supply lately. One big push is needed to complete him.

Wednesday, September 8, 2010

Saving Face

As promised, I have returned with details about what I was working on before my Summer hiatus. The last minis I completed prior to going AWOL were the two Otherworld trolls; excellent sculpts that include a wealth of conversion and customization potential. One neat feature is that each model provides a choice of two heads. Consequently, I was left with a surplus of troll noggins in my spare parts drawer.

At this point, a box lot of minis won on eBay some time ago entered into the equation. Among its various items was a Ral Partha troll from 1982 of the proper size to comfortably accept an OW head. The old mini had a separate head and body configuration that would facilitate a straightforward head-swap.

Normally I'd tend to shy away from major conversion work on a classic mini. In this case, I was prepared to make an exception. I remember this guy from when he first appeared in RP's catalog. My initial impression remains to this day: I like everything but the head.

Beyond producing a figure more to my tastes by merging old and new, there was another benefit to this conversion. I already had two completed OW trolls in my collection. The RP troll, with its extremely long arms and oversized claws, is quite distinct from OW's interpretation. By mounting an OW head in place of the original, a strong family resemblance would be created.


A soak in Simple Green made short work of a scruffy coat of primer. In order to turn the head I cut away the original neck and replaced it with a bent piece of wire. Despite my preference for round bases, a square one is needed to accommodate the left arm. The RP mini includes what seems to be aquatic vegetation draped over its body, as though it has just emerged from the water. What we have here is a freshwater scrag or river troll; the creature from folklore that dwells beneath bridges and waylays unwary travelers.

I intended to cut away the original base and mount the mini on a stone floor similar to the OW trolls; a major undertaking. I see now that doing so would carry the family resemblance concept to excess. A base is the chance to depict a mini in its environment; to place it in context. This fellow belongs on a river bank, not in a dungeon.

Summer's over. Time to get cracking.